Monday, April 30, 2012

Color wheel

Hue
The Color Wheel
The Color Wheel
Hue is another word for color. Red, blue, and yellow are the primary hues, and when combined in equal amounts they create the secondary hues orange, green and violet. When primary and secondary hues that are adjacent on the color wheel are combined, you get the tertiary hues. These colors are shown in the color wheel diagram. When you mix the primary colors in different amounts, you get a limitless number of colors.

Friday, April 27, 2012

A magnetic wall? LOVE IT!

My most recent discovery of brilliance that I wish was my own invention is this good idea! I love the look of pictures and memories hanging on the fridge. {Could be because my father has an aversion to anything hanging on the front of the fridge growing up, and I've always been a bit rebellious!} But this takes that to a whole other level! The genius who came up with this bought a large piece of metal and hung it on a wall in the hallway.

That got me thinking, what would I hang on a large scale metal wall? Here are some things that came to mind:

I am always to inspired by stained glass!

My nephew. He didn't want me to leave! Such a sweetheart!

Silly Miss Madison {my niece}! Always the performer!

My beautiful grandma. Such a classic beauty

I <3 my church campaign!

I just really like these flowers!
What would you put on a giant magnetic wall in your home?

Wednesday, April 25, 2012

It's called decoden... ever heard of it?

I recently discovered this idea on mrkate.com and thought it was a hilarious but also sweet idea for a custom phone case. I struggle to find cases for my iphone that I really like. They all seem so generic and boring to me. So this would be a great solution! I'll post pictures when I am able to try out this technique! But until then, here are the images that started it all, along with the directions!

DIY japanese decoden embellished phone cases
Posted on by mr. kate
i looove this project! Kailea (Mr. Kate’s Operations Manager – her DIY phone cover is the one with the pink bear!) and i have been wanting to do this DIY for so long and we finally did! it’s just so gaudy and hilarious and why NOT have a fun phone case for every day of the week?!
the technique is Kawaii (means cute) Deco-den or Decoden and it’s very Japanese, if you couldn’t already tell. i really love Japanese girl’s style and they’re love of totally over-the-top color and platforms and nails and of course, phones! i think this project is a great way to bring a little Decoden into your life. they make great gift items too and are totally personalize-able… so express yourself with some decoden!
in the video i talk about the style app Pose – which i’m on and you can get for your iPhone, Android or sign up on pose.comfollow me here and share your own rad style pics and follow other inspiring peeps!
Prep It:
  • silicone caulk (i recommend getting the 100% silicone – we used one with latex and acrylic which worked fine but the 100% silicone is an easier consistency to apply).
  • a phone case you done mind covering with frosting (we got a pack of 4 clear iPhone cases for $5 from Ebay)
  • doo dads for your decorations! just search “decoden” on Etsy and it turns up a ton of Kawaii cute things to use as decorations. other options are: jewels, rhinestones, spikes (i got my spikes from studsandspikes.com).
  • utensil like the butt of a pencil
  • optional: frosting tips to put on the nozzle of the silicone tube to create frosting-like designs.
  • pliers or tweezers
DO IT!:
  1. in a well ventilated area, frost the back of your phone cover with the silicone. you may use a frosting tip or just use a pencil to make swirls. layer it on thick!
  2. place your decorations in the toxic frosting. note: plan your layout first before you place because it gets messy if you try to move anything once it’s in the frosting.
  3. let it dry for 2 to 4 hours. since it’s silicone it will never dry chalky hard, it will stay a little mushy, which feels really cool! it’s also not that heavy!
  4. wash your hands and call Effie to tell her what you made!

Monday, April 23, 2012

Cluster Photos

The wall paper is very visually interesting with all the other colors
No need for pictures, just hang the interesting frames on the wall! 
Not just pictures, but other random things. But it looks totally cool, not dumb!

I just love Mr. Kate and her ideas! 
i’ve been working on a very exciting secret project that i will debut here very soon. part of my research turned up these inspiration photos, which i thought i’d post!
a cluster of frames and objects is one of the easiest ways to decorate a wall and pull a room together to look “decorated” without having to go out and buy some large scale art. i wrote about how to hang a cluster of frames here and you can see the finished product of that cluster in this blog post here. you can see my own wall of frames in my place here. you can also use mirrors, like my friend Hannah did here or any other thing that could be mounted on the wall. i like the last photo above how they have plates and a record and a fish as part of the cluster. or you could go very minimalist and just put empty frames up on a colored or textured wall…. so many possibilities and it doesn’t have to be expensive! look at what you have in your own home now and then fill in with inexpensive things from thrift stores, flea markets or garage sales. just remember to lay out your cluster pattern on the floor (a space the size of the wall to be used) before you start poking holes in the wall, so you know exactly what you want placed where.
if you have any feature wall art embellishments you’ve done in your own home that you would like to share, please submit your photos to me! i would love to post them! email kate@mrkate.com
photos: google

Clusters of pictures, frames and random knick knacks always look good in these pictures, done by professionals usually. But I am always fearful to try it on my own. All those holes in the wall and what if it looks terrible? I am going to conquer this fear and update you on how it turns out! So stay tuned!

Friday, April 20, 2012

Window treatments that catch eyes

Here are some great inspirations of quick and easy window treatments that would be great on a budget! I found these at this website!

I especially love these tea towels! They add a cute pop of color in an unexpected way. Definitely worth a try!


Tea Towels or cloth napkins quickly clipped onto Curtain Rings, can bring color and whimsy to your kitchen window. Here’s a fab example captured by the peeps at the kitchen.
DIY Tea Towel Window Treatment


A cheap, white, Roller Window Shade becomes something special when you Customize it With Paint. Here’s a fresh and stripey version from Kitchen & Bath Ideas.
Painted Roller Window Shade

Let’s stick to that simple, White Roller Shade and make an art statement with guess what? Contact Paper. A quick and quirky project from Apartment Therapy Chicago.
AT Contact Paper Customized Window Shade

I’ll admit, this color-addict flipped when I found this Modern Art Window Treatment from the folks at Dummies.com. This example is crafted from solid-colored hues of Contact Paper, but it could as easily highlight an artful mix of patterns, or interesting slices or miniature copies of the kids’ artwork.


DIY Modern Art Window Shade 

 I just love so many things about this picture! I am a sucker for vintage frames grouped together like this. Birdcages are all the rage as it is, aside from my love of feathered friends. AND that return to sender window shade goes perfectly in the window! I found it at apartmenttherapy.com

postage window treatment

Wednesday, April 18, 2012

I love abstract DIY

I also really like the look of this DIY abstract painting! All she used was a large canvas and her son's oil paints. So cheap and easy! This one looks a little more like something I could handle!


Here's the web address

Monday, April 16, 2012

Abstract art DIY

This is a cool website that I found that lays out how to make your own abstract artwork. I always thought abstract art was just paint arbitrarily slapped onto a canvas, but apparently there's a bit more to it!

How to Make Abstract Art DIY

Here's the link to the website 

Here is the second installment of a series I’m doing on how to make affordable art. But until you can afford the abstract piece of your dreams here are some tips on making your own.

Materials Needed: 2 Large Canvases 40″ x 40″ $20/each, a few large brushes 2.5″ wide $5, several tubes of acrylic paint $4/tube  In total this cost $70. That’s $35 each for a huge piece of art. There are no framing costs because with canvas like this you don’t need to frame it.
A few notes: I know abstract art looks “easy” but anyone who has tried it can attest it can be difficult to get just right. I would recommend getting some cheap small 10″x 10″ canvases to practice color and composition and technique before you you try it on a big one. This will save you time and money in the long run. This project does takes a while. It took us 5 painting sessions that ranged from 1-2 hours. Take your time and keep in mind you are working in layers.
Step One: Tone the Canvas.  The first layer you’ll tone the canvas with another color other than plain white. This is so when the underpainting shows through it will show texture instead of plain white. For this we just mixed lots of yellows with white and grey. We used lots of water and were sloppy and just tried to have variation. We also painted the edges. Then let it dry.

Step Two: We sat down and drew out with pencils some compositions we liked. We didn’t totally stick to this but it was nice to have a guide to start off of. Once we had a plan we began blocking out some colors. A big part of this project is getting comfortable mixing paint. I’m not very good at it and have to depend on Paul a lot to get the colors I want but basically you start with a base color and add other colors to lighten or darken.  I had Paul mix some paint to demonstrate. Here he used white, red, yellow, and green to get all of these colors. Make sure to add extra water to thin out the paint. You can add smudges and streaks on that layer without thinking about it too much since its only the second layer. Then let it dry.

Step Three: Now you’ll want to start to get more serious about what it looks like. Sometimes abstract art looks simple but after working through a few variations we found our favorite compositions seemed simple but when we actually looked closer and broke it down it was made up of complicated shapes. For example look at the painting on the left. The red and the blue look simple but in the close up you can see there are lots of layers and streaks and lines so that it looks interesting. Keep making small adjustments until you like it. One time we didn’t like the painting but went to bed and when we woke up we actually loved it. So if you are getting frustrated take a break and come back when your mind is clear. Be experimental and keep trying things (adding white etc) until you are happy with it.

Step Four: We started to play around with the colors we wanted to compliment the top layer. You can see we also went through and lightened up the edges with some off white paint ro make the painting feel brighter. At this point we were starting to like it but it needed to feel pulled together.

Step Five: In the final painting session we tried to perfect the composition. Our technique was to block in some brighter colors and then make them meet in interesting ways with different lines and shapes. Here is how the final turned out. You can see that with the final layer there are 15-20 colors and 12 or so blocked out colors in the center. The main thing is to keep trying different colors  and shapes until you are happy with it. Et voilĂ ! Your artwork is complete.

Thursday, April 12, 2012

bursts of color

There is an Italian restaurant in Mt. Pleasant, Michigan that plays a little trick on you in the bathroom. That sounds awkward, but bare with me! The outside of the bathroom doors are painted with "Ladies" and "Gentlemen" respectively in fancy gold and red lettering. Once inside, if you look at the inside of the door, they are each {according to a male source as well} painted with the opposite gender in the same manner. The first time I noticed it I had a moment of panic before I looked around and didn't see and urinals and was assured that I had walked into the woman's bathroom.

I really appreciate decorative humor!

I also love the look of painting doors in a house. They can add fun and a punch of color, especially if they are sneaky, like only having color on the inside of the door. That is definitely a fun surprise!

Here is a great website resource for some visuals of what I am talking about: Painted doors

Tuesday, April 10, 2012

Kitchen chairs

I love the idea of mismatched kitchen chairs! There will be little uniformity in my home.

mismatched chairs

bohemian-jewel-box

I just think mismatched chairs make this party space so cozy and fun!

I first became obsessed with the idea of having kitchen chairs that look as different as possible when I was a young girl waching FRIENDS with my sister. The chairs in Monica's apartment were all different sizes styles and colors. At first I didn't understand because my parents' house is all about uniformity in size style and color {right down to the matching wood... not my style at all}, but now that I am older, wiser, and much more style conscious, I love the idea.

Last summer I found a wooden chair that has a really unique styled back and legs with sunshine yellow paint chipping and it was the only one left at a rummage sale. After making sure the legs were sturdy and it wasn't missing any pieces, I scored it for $10! I painted it back to its original yellow glory and it is currently in my bedroom. When I get a house of my own it will serve as the beginning of a collection of random kitchen chairs and a {hopefully} equally as random kitchen table! {Just hoping that whoever I marry has the same good taste, or enough sense to keep his mouth shut and just nod and smile!}

Monday, April 9, 2012

Can't get enough COLOR!

I love color! And I hope you do too! Color has some kind of crazy power over us. It can make you happy, calm, excited, aggressive, and any other emotion out there. People have done studies on it even! It makes me sad when people don't try color, instead just sticking to black and white.

My mother is the worst offender of this that I personally know. For years and years the only color in our house was my bedroom. Every wall was plain white with barely anything hanging on them. The carpet was a neutral tan color. And even the kitchen appliances were white. But my bedroom was a happy blue, walls and carpet! It was a bit too much but I was rebelling from years and years and years of plain white bland design.

Now I can't get enough color in my life! I love brightly colored purses, shoes, clothes, jewelry, decor, and I really love this idea of a colorful wedding. I have a feeling that when it comes time for me to say my "I do's" my mom and I will have some disagreements on the decorations for the wedding! My sister had a very traditional, fancy wedding, but I would feel too lost in the stuffy atmosphere of anything traditional! I have always been a bit of a wild child! {The fact that I plan to marry in my bare feet has always been a joke among my family, but it's totally my plan!!}

Colors also have the power to make people think and feel certain things. I love learning about what certain colors evoke.

Here are some meanings behind colors:

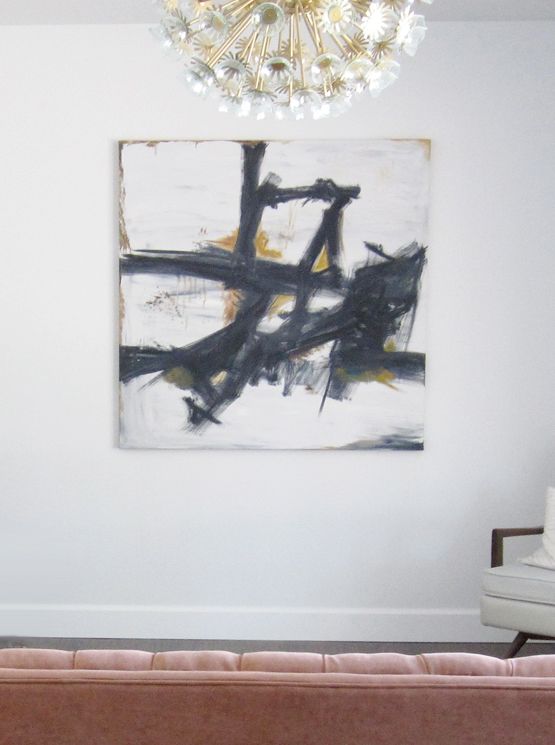
Black is the color of authority and power. It is popular in fashion because it makes people appear thinner. It is also stylish and timeless. Black also implies submission. Priests wear black to signify submission to God. Some fashion experts say a woman wearing black implies submission to men. Black outfits can also be overpowering, or make the wearer seem aloof or evil. Villains, such as Dracula, often wear black.

Brides wear white to symbolize innocence and purity. White reflects light and is considered a summer color. White is popular in decorating and in fashion because it is light, neutral, and goes with everything. However, white shows dirt and is therefore more difficult to keep clean than other colors. Doctors and nurses wear white to imply sterility.

The most emotionally intense color, red stimulates a faster heartbeat and breathing. It is also the color of love. Red clothing gets noticed and makes the wearer appear heavier. Since it is an extreme color, red clothing might not help people in negotiations or confrontations. Red cars are popular targets for thieves. In decorating, red is usually used as an accent. Decorators say that red furniture should be perfect since it will attract attention.

The most romantic color, pink, is more tranquilizing. Sports teams sometimes paint the locker rooms used by opposing teams bright pink so their opponents will lose energy.

The color of the sky and the ocean, blue is one of the most popular colors. It causes the opposite reaction as red. Peaceful, tranquil blue causes the body to produce calming chemicals, so it is often used in bedrooms. Blue can also be cold and depressing. Fashion consultants recommend wearing blue to job interviews because it symbolizes loyalty. People are more productive in blue rooms. Studies show weightlifters are able to handle heavier weights in blue gyms.

Cheerful sunny yellow is an attention getter. While it is considered an optimistic color, people lose their tempers more often in yellow rooms, and babies will cry more. It is the most difficult color for the eye to take in, so it can be overpowering if overused. Yellow enhances concentration, hence its use for legal pads. It also speeds metabolism.

The color of royalty, purple connotes luxury, wealth, and sophistication. It is also feminine and romantic. However, because it is rare in nature, purple can appear artificial.

Currently the most popular decorating color, green symbolizes nature. It is the easiest color on the eye and can improve vision. It is a calming, refreshing color. People waiting to appear on TV sit in "green rooms" to relax. Hospitals often use green because it relaxes patients. Brides in the Middle Ages wore green to symbolize fertility. Dark green is masculine, conservative, and implies wealth. However, seamstresses often refuse to use green thread on the eve of a fashion show for fear it will bring bad luck.

fabulous headboard

Headboard frame {Thank you daddy for helping with the sawing and drilling!}

Next step: Frame with plywood for extra support

Next: 1x3 boards. I laid them in an uneven pattern so they wouldn't look so perfect

View from above

Then I went to work beating it up to make it look more worn and aged. {This was a great way to relieve stress!}

Lightly stained the wood to make it even more aged

Close up of stained boards {Complete with glass ring!}


I really liked the idea of making a headboard on my own. It is cheaper and easier to make it my own, both of which appealed to me! I don't like the big box store furniture and decorations. I much prefer things that have a story or have lived a life already and it is evident. Lucky for me, my dad is pretty handy with a saw and power tools, so he helped me build it so I could decorate it. I knew I didn't want it to look fresh and clean, so we found some wood that wasn't exactly perfect and could easily be made to look older.

After it was assembled, I had maybe a little too much fun beating it up. I predominantly used a small hammer, mostly the claw part, to make dings and dents in the wood. I also used sand paper to rough it up a bit. {I also made sure to sand down the edges so there weren't any splinters on the exposed edges.}

I used 2 different kinds of stain, pecan and cherry. The pecan was a little too light for my liking, so I went over parts with the cherry as well, making sure to get stain down into the dents and dings and scuffs for added effect.

The end result was great! I may still add a little splattered paint or possibly a stencil to it, but I am not sure yet!

My lesson learned was: I made a quality headboard that is my style for $60 and got to spend time with my dad! {Similar headboards sell for over $100} I call that an all around win!

Friday, April 6, 2012

More inspiration

Here are some more inspiring sites and ideas that I fell in love with!

Create a custom chalkboard

No Sew curtains using a fitted sheet and ribbon!

book page lined drawers Love this idea! I may need to do this in the dresser I will be purchasing once we get a house!

Here are some other things that I am thinking:

• I really want a royal purple shower curtain if we get the house she is currently looking at. I will also need towels, which I'm thinking will look good in dark gray or black. And purple rugs.

• Possibly paint the walls in the bathroom a subtle white gray {they are currently sparkling white}.

• The walls in what would be my bedroom are an awful shade of diarrhea brown and must be changed before I'll even be able to sleep in there! I see them as a light gray as well, with teal accents throughout the room.

• I'll need a dresser. I'm hoping for a cute one that I can paint and decorate. I really like the above idea of using pages from books to line the inside of the drawers. {I'm going to start looking for vintage versions of some of my favorite books in antique shops and thrift shops}. In fact, I have a night stand that I recently repainted and I may have to try this out on those drawers too!

• I saw on Pinterest a lamp with a plain colored lamp shade and they had written verses and quotes around the shade. It looked really cool and very personalized. I will be trying this as well!

• There's a project that I did once when I worked at a daycare that could work as cheap, unique picture wall inspiration. Instead of tons of picture frames, I am thinking of cutting a ziploc baggy and making a plastic sleeve that can be attached to the wall and the pictures can be easily interchangeable!

Thursday, April 5, 2012

My first DIY

I am finally doing it! Moving out of my parents house and into my own place. Well, I guess it's not actually my own place, I'm moving in with my sister and her kids.

HERE ARE SOME THINGS THAT INSPIRE ME, AN INSPIRATION BOARD OF SORTS:

There are some cute before and after bedroom makeovers that I really like: HERE

Tufted headboard ideas

Mr. Kate playful color palette

Mr. Goodwill Hunting blog

Grayblue dresser I think I want to have a light neutral dresser, but I would paint the inside of the drawers a funky bright color, like a sunshine yellow!

chalkboard tabletop  so cute!